I strongly believe school to be one of the most important cornerstones of society. I admire and value the skills, knowledge, focus and energy teaching takes. I think I understand its complexity. Loads of people have things to say about school, but are not necessary experts. I therefore choose a modest attitude; my biggest fear is to be perceived as an ignorant idiot shouting from the sideline.
Having said that: we are working on an idea. And I’d love to present it to you. I see big chances for makerEd, but I also worry. I worry makerEd will remain the fun guest-appearances by specialised teachers. I worry the context will remain too small: it is either art or something tech but cannot become core. But I think we can solve that.
So, anticipating your honest comments, I nervously present;
- An idea on makerEd in primary schools,
- That will lead to a strong implementation,
- With lessons for kids age 4 up top 12.
- Designed as modules, so teachers can fit it into their program on their own terms.
Please criticise, contribute, spit on it, embrace it, send loving feedback, show me my place, all is good. Here goes:
Building Bauhaus
Thinking about makerEd takes me back to art school, where I learnt about Bauhaus. (It was in fact Partrick Benfield who sent me in that direction! See the comic I made some time ago.) Specifically the curriculum circle Walter Gropius invented.

(Photo taken from the book Bauhaus by Jeannine Fiedler and Peter Feierabend)
From the outside in, novice to experienced, all connected. I love it.
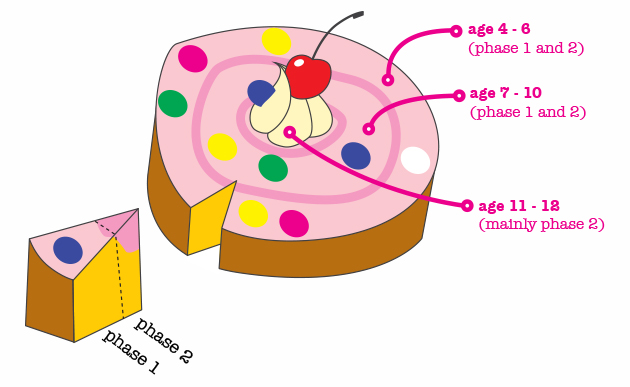
Our poster can be seen in a circle too:
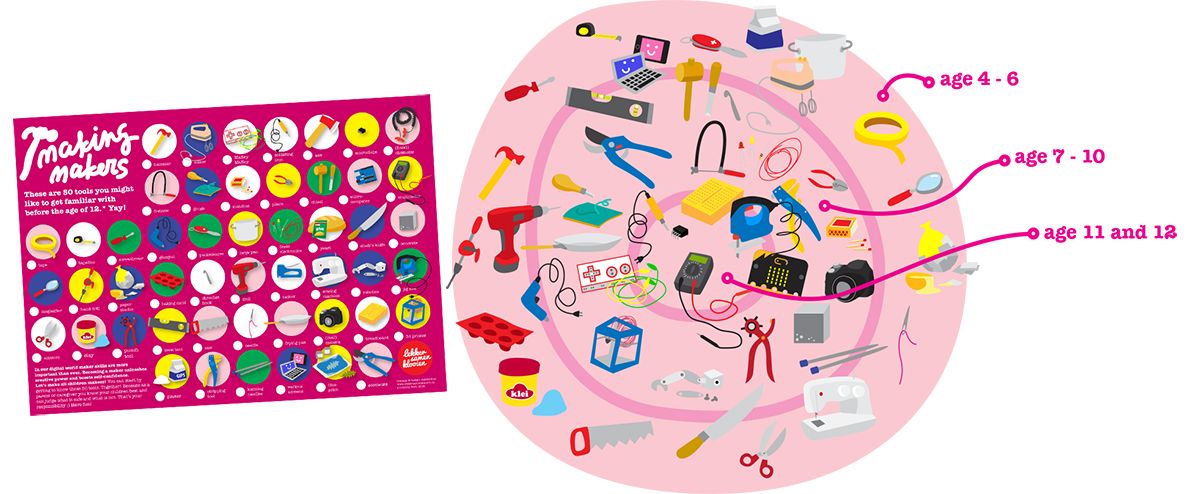
Discovery, developing skills, apply
We did design our poster like that. It has tools for different ages. That can be seen as a learning system. But how can we work that into a lesson plan? Let’s give it a go.
In mastering a tool there are three steps:

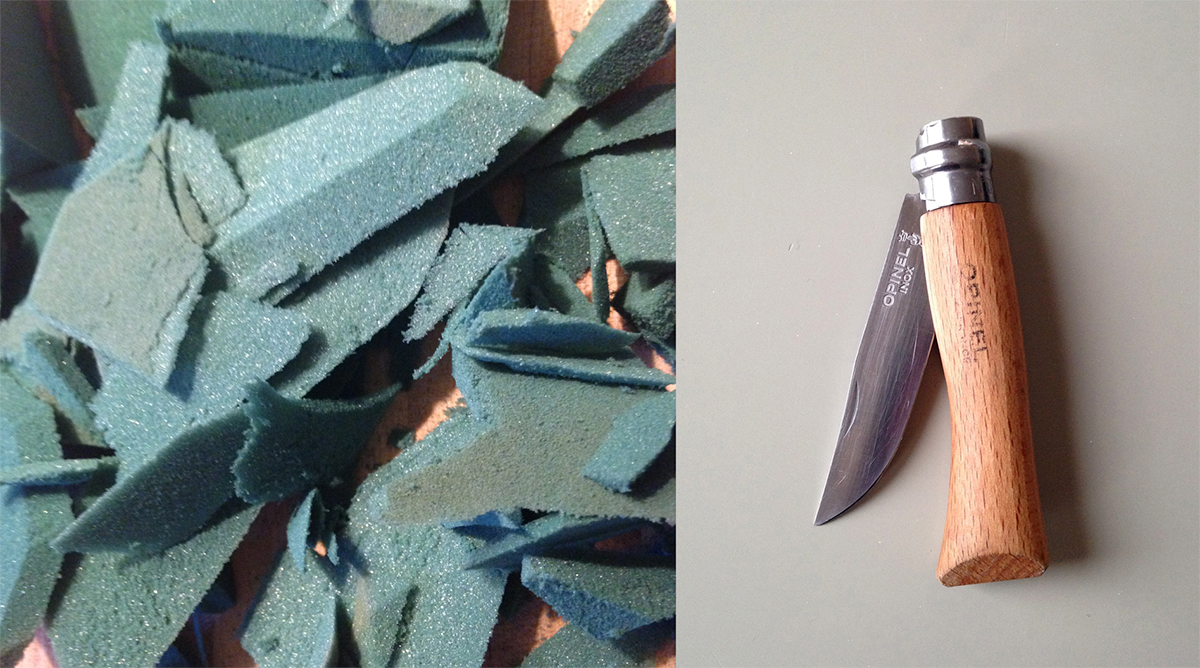
discovery
Feel, try. There is no goal, there is only the experience. Cut stuff for the sake of cutting. How does it feel when a knife glides thru floral foam? What’s it like to unroll a roll of tape in one go? (Ever done that?)
Often this first step is the one that’s missing; young children are allowed discovery (age 4 and 5), but after that school often becomes more formal: focus on skills and applying. But discovery is important for everything new. No matter your age.
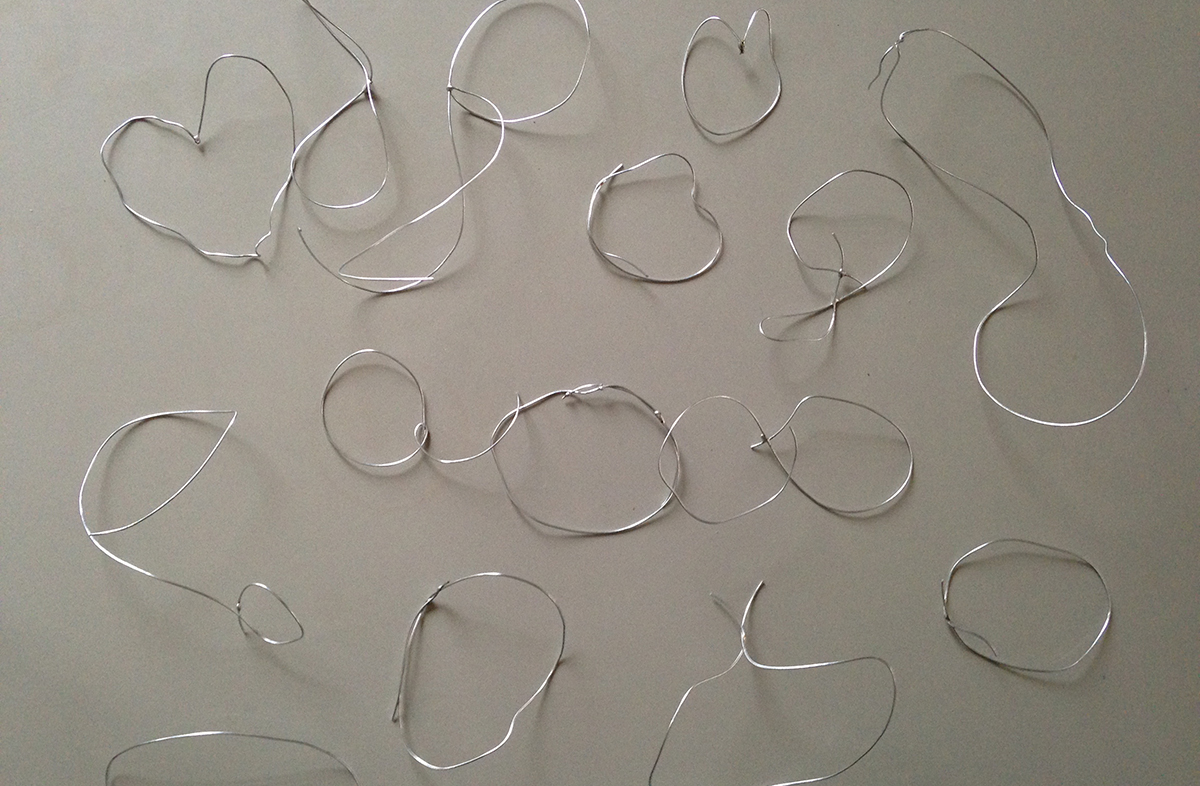
skills
Mastering the tool, being able to get the results you envision. In this phase it is about skills, and not the product as an outcome per se. Soldering loads of little circles!
apply
Finally kids learn to apply their skills in a product. The technical ability is used for the achievement of a goal.
Context
Of course -like in Bauhaus – the lessons are part of a bigger context. Especially in phase three where kids apply what they learnt in projects that can be about science, art, language, or whatever the teacher wants.
<disclaimer> MakerEd is not (only) about tools, I get that. But I found tools to be a bit of a ’trojan horse’ entrance for children who believe themselves to be a) not creative and/or b) not tech. Nobody is offended or scared off by a hammer! Hence the tool-approach. </disclaimer>
I strongly believe mastering a lot of different tools and materials enlarges your self-confidence and creative thinking. Each experience enlarges the mental toolbox kids can think with.
In school: 2 phases
The three steps mentioned before could be fit into two phases or lessons.
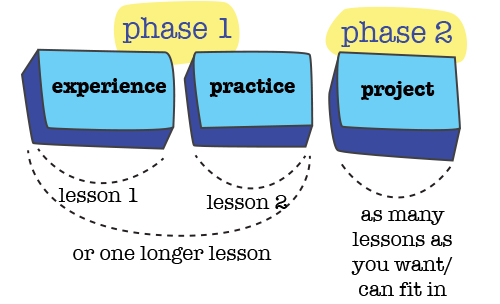
Step 1 and 2 are connected and combine into phase one. Both processes are often more or less simultaneously of switch turns quickly. Lesson 1 and 2 can seem similar or can be combined into one long lesson. Step 3 is phase 2: the project of product, in which the pupil will prove the learning succeeded.
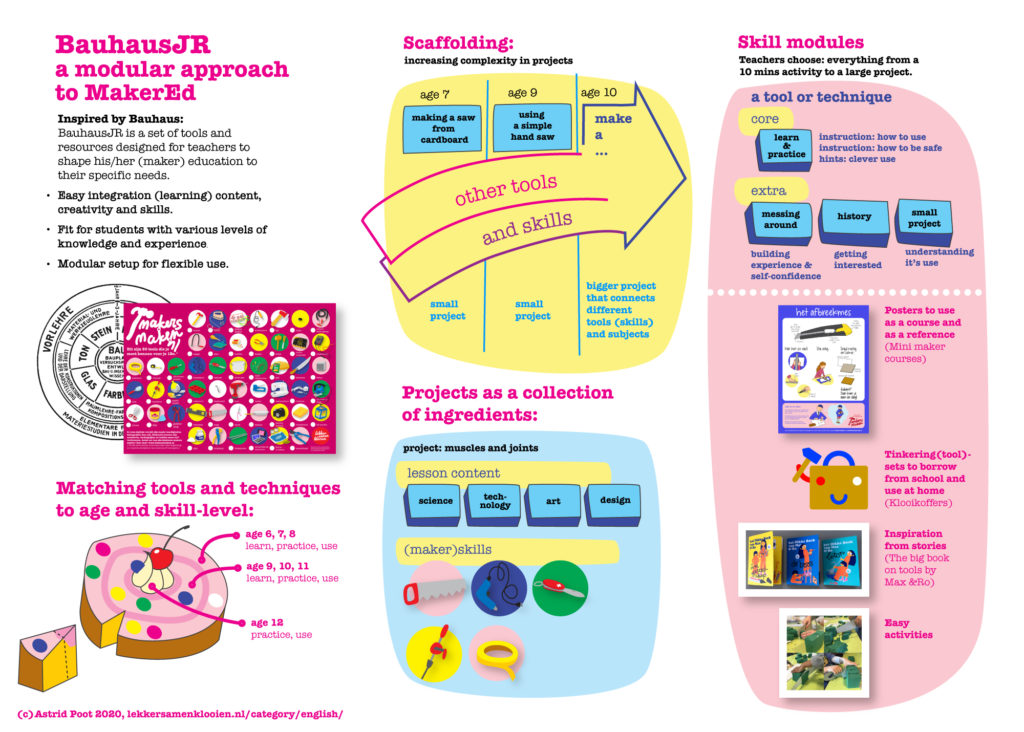
BAUHAUS JR* bit by bit
*We’d love to call our model Bauhaus JR, but that’s probably not allowed. Consider it a working title until we come up with something better.
In our model the tools are spread across the different years in school and the lessons are always structured in the same way. Content of the lesson vary of course. Pupils always start in phase one (discovery and skills). They work towards a product in phase two (apply).
Like in this example:
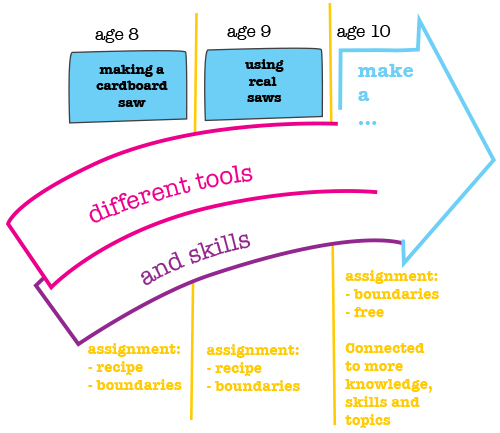
Recipes, boundaries or freedom
The assignments are different per phase. Recipes and assignments with boundaries fit with phase 1, boundaries and free assignments fit phase 2. Science teacher and Fablearn fellow Per-Ivar Kloen wrote this down perfectly. I’ll be quoting from his blog:
recipe: do exactly this
PI: With recipes or manuals there is linear learning. You know what it is that they are learning, most often in set steps. The how is set too. Recipes are a good way of teaching skills, techniques, and basic knowledge.
From set boundaries: do something within these rules
The boundaries dictate the free space. Make a saw from cardboard, race from A to B as fast as you can, make a chain reaction in a box. Pupils can choose their approach, while the assignment offers enough structure to start immediately. Limitation is liberating.
freedom: do something
PI: The assignments that have the most freedom are those in which students make what they want to make. It’s doesn’t really matter what, you make what you want to. We often have only one restriction: the outcome has to be something that actually works. You could say that in this type of assignment you can’t measure how the student learns, but you also don’t really know what is learnt.
In the free assignment a link to other subjects can be made: a language link, or a link to a science subject. Then you add boundaries to the freedom.
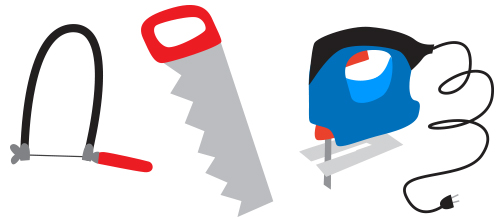
in practice: sawing with 8 year olds
lesson 1: about the saw
We start off with inspiration. We tell about the history of the saw; tools have so many nice stories to tell! (Check book 1 en book 2.) We also explain how it works: what does it do exactly? (Here we can feature expert makers: craftspeople who showcase their work.)

After that a small assignment: make a cardboard saw and test on floral foam to see if it works. Improve. (Assignment with boundaries.)

Lesson 2: mastering the saw
In the second lesson, the class tries out different saws and materials. (Recipe)
Lesson 3: make a birdhouse for a native bird
The third lesson is related to the hammer, and also biology (what birds are native and what do they need?) and design. (Again: boundaries.)
the whole school
Eventually, the system could work like this: the children master the use of tools and materials and use their knowledge and skills in a small assignment.
Throughout their school career, the build a broad set of knowledge, skills and experience and may use that in a big free final assignment. They leave primary school as skilled confident makers.
Ambition
We made the poster and a lot of lessons already. We get a lot of positive feedback from schools and education experts. And we want to carry on. Wouldn’t it be great if we can offer all schools a big tool wall, with matching lessons and activities, and guidelines how to implement makerdEd in your school, on your conditions?
questions
We are developing the plan in small steps. And there is a lot we don’t now, so we are desperate for feedback.
- What about the plan as I wrote it down?
- What are the risks? What makes is great?
- Does it exist already? And does it work?
- Which of the 50 tools make sense?
- How will we connect to the whole curriculum?
- How will we handle the differences between children?
- How will we make sure the teacher feels safe and in control?
Maker superpower
Our dream is to offer children as many hands-on learning experiences as possible, in as many ways possible. In school, connected to the other things they learn and do. Children will grow their mental toolbox, and gain maker superpower: to be able to see everything as material, and a problem as the start of a plan. ‘We want all kids to believe they can change the world.’ as my fab maker-friend Per-Ivar put it. Couldn’t agree more!
Overview